This tutorial shows some advanced techniques related to Shaders.
You will learn how to perform multipassing, how to define LODs (level of detail) in your Effects and how to animate your Shaders using the vl::ShaderAnimator class.
Visualization Library allows you to define quite intricate effects combination setups. You can in fact define several level of detail modes for your Effects. Each level of detail defines its own set of Shader passes, that is, VL will draw the object once for each pass using the corresponding Shader. And on top of all you can also animate your Shaders by defining a subclass of vl::ShaderAnimator and binding it to the Shader you want to animate!
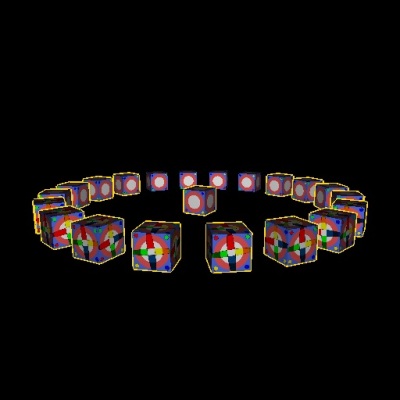
The following example renders a simple scene with a few cubes. At LOD #0 the cubes are rendered using two passes. The firs pass renders the geometry using two textures out of which the second is animated using a roto-scaling effect. The second pass uses an animated outline blinking shader. At LOD #1 the cubes are rendered using two passes again. But in this case the first pass uses a simple non animated texture. The second pass uses again the outline blinking animated shader. At LOD #2 the cubes are rendered with a single pass using a simple texture.
[From App_ShaderMultiPassLODAnim.cpp]
#include "BaseDemo.hpp"
#include <vlCore/Colors.hpp>
#include <vlGraphics/GeometryPrimitives.hpp>
#include <vlGraphics/DistanceLODEvaluator.hpp>
#include <vlGraphics/PixelLODEvaluator.hpp>
#include <vlGraphics/Light.hpp>

// color blinking effect
class BlinkShaderAnimator: public vl::ShaderAnimator
{
public:
  void updateShader(vl::Shader* shader, vl::Camera*, vl::real cur_time)
  {
    int c = (int)( cur_time * 15.0 ) % 2;
    vl::fvec4 color;
    if (c == 0)
      color = vl::gold;
    else
      color = vl::red;
    shader->gocMaterial()->setFlatColor( color );
  }
};

// texture roto-scale effect applied on the second texture unit
class TexRotScaleShaderAnimator: public vl::ShaderAnimator
{
public:
  void updateShader(vl::Shader* shader, vl::Camera*, vl::real cur_time)
  {
    vl::fmat4 mat;
    mat.translate(-0.5,-0.5,0.0f);
    mat.rotate( cur_time * 90, 0, 0, 1 );
    float s = 0.5f + (float)sin( cur_time * vl::fPi * 2.0f )*0.5f + 0.5f;
    mat.scale( s, s, s );
    mat.translate(+0.5,+0.5,0.0f);
    shader->gocTextureMatrix(1)->setMatrix( mat );
  }
};

// color fading effect
class MyShaderAnimator1: public vl::ShaderAnimator
{
public:
  void updateShader(vl::Shader* shader, vl::Camera* , vl::real cur_time)
  {
    float t = (float)sin( cur_time*vl::fPi*2.0f )*0.5f + 0.5f;
    vl::fvec4 col = vl::red*t + vl::blue*(1-t);
    shader->gocMaterial()->setFlatColor(col);
  }
};

/*
This demo shows how to use of the following techniques: shader LOD, shader animation, shader multipassing.
*/
class App_ShaderMultiPassLODAnim: public BaseDemo
{
public:
  void initEvent()
  {
    vl::Log::notify(appletInfo());

    // to be used later
    vl::ref<vl::Light> light = new vl::Light;
    vl::ref<vl::Texture> texture;

    // define LOD evaluator with 3 distance ranges: [0] --- 70 --- 100 --- [inf]
    vl::ref<vl::DistanceLODEvaluator> lod_eval = new vl::DistanceLODEvaluator;
    lod_eval->distanceRangeSet().push_back(70);
    lod_eval->distanceRangeSet().push_back(100);

    // texture roto-scaling effect
    vl::ref<vl::Shader> tex_rot_scale_sh = new vl::Shader;
    tex_rot_scale_sh->enable(vl::EN_DEPTH_TEST);
    tex_rot_scale_sh->enable(vl::EN_CULL_FACE);
    tex_rot_scale_sh->enable(vl::EN_LIGHTING);
    tex_rot_scale_sh->setRenderState( light.get(), 0 );
    texture = new vl::Texture("/images/holebox.tif", vl::TF_RGBA);
    tex_rot_scale_sh->gocTextureSampler(0)->setTexture( texture.get() );
    // on this unit we'll apply the roto-scale effect
    texture = new vl::Texture("/images/star2.tif", vl::TF_RGBA);
    tex_rot_scale_sh->gocTextureSampler(1)->setTexture( texture.get() );
    tex_rot_scale_sh->gocTextureSampler(1)->texture()->getTexParameter()->setWrapS(vl::TPW_REPEAT);
    tex_rot_scale_sh->gocTextureSampler(1)->texture()->getTexParameter()->setWrapT(vl::TPW_REPEAT);
    // install shader animator
    tex_rot_scale_sh->setShaderAnimator( new TexRotScaleShaderAnimator );

    // simple texture effect
    vl::ref<vl::Shader> tex_sh = new vl::Shader;
    tex_sh->enable(vl::EN_DEPTH_TEST);
    tex_sh->enable(vl::EN_CULL_FACE);
    tex_sh->enable(vl::EN_LIGHTING);
    tex_sh->setRenderState( light.get(), 0 );
    texture = new vl::Texture("/images/holebox.tif", vl::TF_RGBA);
    tex_sh->gocTextureSampler(0)->setTexture( texture.get() );

    // wireframe outline blinking shader
    vl::ref<vl::Shader> blink_sh = new vl::Shader;
    blink_sh->enable(vl::EN_DEPTH_TEST);
    blink_sh->enable(vl::EN_CULL_FACE);
    blink_sh->enable(vl::EN_LIGHTING);
    blink_sh->setRenderState( light.get(), 0 );
    blink_sh->gocPolygonMode()->set(vl::PM_LINE,vl::PM_LINE);
    blink_sh->gocFrontFace()->set(vl::FF_CW);
    blink_sh->gocLineWidth()->set(3.0f);
    // install shader animator
    blink_sh->setShaderAnimator(new BlinkShaderAnimator);

    // define the effect with 3 lods
    vl::ref<vl::Effect> effect = new vl::Effect;
    effect->setLOD( 0, tex_rot_scale_sh.get(), blink_sh.get() ); // note multi-pass
    effect->setLOD( 1, tex_sh.get(), blink_sh.get() ); // note multi-pass
    effect->setLOD( 2, tex_sh.get() );

    // install LOD evaluator
    effect->setLODEvaluator(lod_eval.get());

    // generate template geometry
    vl::ref<vl::Geometry> box = vl::makeBox( vl::vec3(0,0,0), 5,5,5);
    box->computeNormals();
    // use the same texture coordinates for unit #0 and unit #1
    box->setTexCoordArray(1, box->texCoordArray(0));

    // form a ring with cubes
    for(int i=0; i<24; ++i)
    {
      vl::ref<vl::Transform> tr = new vl::Transform;
      rendering()->as<vl::Rendering>()->transform()->addChild(tr.get());
      vl::mat4 mat;
      mat.translate(30,0,0);
      mat.rotate( 360.0f / 20.0f * i, 0, 1, 0);
      tr->setLocalMatrix( mat );
      sceneManager()->tree()->addActor(box.get(), effect.get(), tr.get());
    }

    // add central cube
    sceneManager()->tree()->addActor(box.get(), effect.get(), new vl::Transform);
  }

  // animate the scene
  void updateScene()
  {
    vl::real t = sin( vl::Time::currentTime() * vl::fPi * 2.0f / 8.0f ) * 0.5f + 0.5f;
    vl::vec3 eye( 130*t+5, t*20+5, 0 );
    eye = vl::mat4::getRotation( vl::Time::currentTime() * 15.0f, 0, 1, 0 ) * eye;
    vl::mat4 m = vl::mat4::getLookAt( eye, vl::vec3(0,0,0), vl::vec3(0,1,0) );
    rendering()->as<vl::Rendering>()->camera()->setViewMatrix(m);
  }
};

// Have fun!