Visualization Library 2.1.0

A lightweight C++ OpenGL middleware for 2D/3D graphics

VL     Star     Watch     Fork     Issue

[Download] [Tutorials] [All Classes] [Grouped Classes]
Basic Scene Setup

Setting up the rendering of a simple scene

The following example shows how to implement a simple 3D application by simply subclassing the UIEventListener class. The example below uses the vlWin32 bindings but the concepts remain valid for other bindings as well.

Complete source: src/examples/Win32_direct.cpp

#include <vlCore/Time.hpp>
class MyApplet: public vl::UIEventListener
{
public:
MyApplet()
{
// allocate rendering and scene manager
mRendering = new vl::Rendering;
mSceneManager = new vl::SceneManagerActorTree;
mRendering->sceneManagers()->push_back( mSceneManager.get() );
}
// ----- UIEventListener -----
virtual void initEvent()
{
// --- scene setup ---
// bind the Transform with the transform tree of the rendring pipeline
mCubeTransform = new vl::Transform;
rendering()->transform()->addChild( mCubeTransform.get() );
// create the teapot's Geometry and compute its normals to support lighting
teapot->computeNormals();
// setup the effect to be used to render the teapot
// enable depth test and lighting
// add a Light to the scene, since no Transform is associated to the Light it will follow the camera
effect->shader()->setRenderState( new vl::Light, 0 );
// enable the standard OpenGL lighting
// set the front and back material color of the teapot
// "gocMaterial" stands for "get-or-create Material"
effect->shader()->gocMaterial()->setDiffuse( vl::gold );
effect->shader()->gocMaterial()->setSpecular( vl::white );
effect->shader()->gocMaterial()->setShininess( 60 );
// add actor to the scene
sceneManager()->tree()->addActor( teapot.get(), effect.get(), mCubeTransform.get() );
// --- render target, viewport, camera position ---
// install the render target belonging to the opengl window
rendering()->renderer()->setFramebuffer( openglContext()->framebuffer() );
// set clear color to white
rendering()->camera()->viewport()->setClearColor( vl::white );
// define the camera position and orientation
vl::vec3 eye = vl::vec3(0,10,20); // camera position
vl::vec3 center = vl::vec3(0,0,0); // point the camera is looking at
vl::vec3 up = vl::vec3(0,1,0); // up direction
vl::mat4 view_mat = vl::mat4::getLookAt(eye, center, up);
rendering()->camera()->setViewMatrix( view_mat );
// --- trackball manipulator ---
// bind the camera to be manipulated
trackball->setCamera( rendering()->camera() );
// manipulate the camera's transform
trackball->setTransform(NULL);
// rotation pivot coordinates
trackball->setPivot( vl::vec3(0,0,0) );
// install the trackball
}
virtual void updateEvent()
{
// --- scene update ---
// rotates the teapot around the Y axis 15 degrees per second
vl::real degrees = vl::Time::currentTime() * 15;
vl::mat4 matrix = vl::mat4::getRotation( degrees, 0,1,0 );
mCubeTransform->setLocalMatrix( matrix );
// --- rendering ---
// set frame time (used for animation updates etc.)
// execute rendering
rendering()->render();
// swap back and front buffers
if ( openglContext()->hasDoubleBuffer() )
}
virtual void resizeEvent(int w, int h)
{
// update viewport dimensions
rendering()->camera()->viewport()->set( 0, 0, w, h );
// update the projection matrix
vl::mat4 proj_matr = vl::mat4::getPerspective( 60 /*FOV*/, (float)w/h, 5/*near plane*/, 100/*far plane*/);
/* can also be done like this:
(the camera already knows the viewport dimensions and aspect ratio)
rendering()->camera()->setProjectionPerspective( 60, 5, 100 ); */
}
virtual void destroyEvent() {}
virtual void enableEvent(bool) {}
virtual void mouseMoveEvent(int, int) {}
virtual void mouseUpEvent(vl::EMouseButton, int, int) {}
virtual void mouseDownEvent(vl::EMouseButton, int, int) {}
virtual void mouseWheelEvent(int) {}
virtual void keyPressEvent(unsigned short, vl::EKey) {}
virtual void keyReleaseEvent(unsigned short, vl::EKey) {}
virtual void fileDroppedEvent(const std::vector<vl::String>&) {}
virtual void visibilityEvent(bool) {}
// ----- user methods -----
const vl::Rendering* rendering() const { return mRendering.get(); }
vl::Rendering* rendering() { return mRendering.get(); }
const vl::SceneManagerActorTree* sceneManager() const { return mSceneManager.get(); }
vl::SceneManagerActorTree* sceneManager() { return mSceneManager.get(); }
public:
vl::ref<vl::Transform> mCubeTransform;
};
int APIENTRY WinMain(HINSTANCE /*hCurrentInst*/, HINSTANCE /*hPreviousInst*/, LPSTR /*lpszCmdLine*/, int /*nCmdShow*/)
{
/* open a console so we can see the applet's output on stdout */
/* init Visualization Library */
/* setup the OpenGL context format */
format.setDoubleBuffer(true);
format.setRGBABits( 8,8,8,0 );
format.setDepthBufferBits(24);
format.setFullscreen(false);
format.setMultisample(false);
/* Initialize the OpenGL context and window properties */
int x = 0, y = 0, width = 512, height= 512;
win32_window->initWin32GLWindow(NULL, NULL, "Golden Teapot", format, x, y, width, height );
/* bind the applet so it receives all the GUI events related to the OpenGLContext */
win32_window->addEventListener( new MyApplet );
/* show the window */
win32_window->show();
/* run the Win32 message loop */
int res = vlWin32::messageLoop();
/* deallocate the window with all the OpenGL resources before shutting down Visualization Library */
win32_window = NULL;
/* shutdown Visualization Library */
return res;
}
// Have fun!


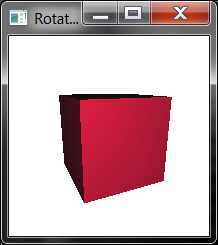
Implementing a rotating cube using the vl::Applet utility class

Visualization Library comes with several utility components to quickly develop applictions under several GUI frameworks. The vl::Applet class is an utility class that implements an event-driven application with a default rendering pipeline. Below is a practical examples of how to implement a vl::Applet that renders a spinning cube and how to use it (unchanged!) with Win32, MFC, Qt4, SDL and GLUT!

The vl::Applet subclasses the UIEventListener in a way very similar to the MyApplet class seen in the example above, but provides a few useful "pre-packaged" services such as quitting the application by pressing ESC, swticthing to fullscreen by pressing F1, taking a screenshot by pressing F5, both tracball and ghost manipulators etc. See the documentation page of vl::Applet for more information.

Complete source: src/examples/Applets/App_RotatingCube.hpp

#include <vlCore/Time.hpp>
class App_RotatingCube: public vl::Applet
{
public:
// called once after the OpenGL window has been opened
void initEvent()
{
// allocate the Transform
mCubeTransform = new vl::Transform;
// bind the Transform with the transform tree of the rendring pipeline
rendering()->as<vl::Rendering>()->transform()->addChild( mCubeTransform.get() );
// create the cube's Geometry and compute its normals to support lighting
vl::ref<vl::Geometry> cube = vl::makeBox( vl::vec3(0,0,0), 10, 10, 10 );
cube->computeNormals();
// setup the effect to be used to render the cube
// enable depth test and lighting
// add a Light to the scene, since no Transform is associated to the Light it will follow the camera
effect->shader()->setRenderState( new vl::Light, 0 );
// enable the standard OpenGL lighting
// set the front and back material color of the cube
// "gocMaterial" stands for "get-or-create Material"
effect->shader()->gocMaterial()->setDiffuse( vl::crimson );
// install our scene manager, we use the SceneManagerActorTree which is the most generic
rendering()->as<vl::Rendering>()->sceneManagers()->push_back(scene_manager.get());
// add the cube to the scene using the previously defined effect and transform
scene_manager->tree()->addActor( cube.get(), effect.get(), mCubeTransform.get() );
}
// called every frame
virtual void updateScene()
{
// rotates the cube around the Y axis 45 degrees per second
vl::real degrees = vl::Time::currentTime() * 45.0f;
vl::mat4 matrix = vl::mat4::getRotation( degrees, 0,1,0 );
mCubeTransform->setLocalMatrix( matrix );
}
protected:
vl::ref<vl::Transform> mCubeTransform;
};
// Have fun!

Using the Qt4 Utility Bindings

Complete source: src/examples/Qt4_example.cpp

#include "Applets/App_RotatingCube.hpp"
using namespace vl;
using namespace vlQt4;
int main(int argc, char *argv[])
{
QApplication app(argc, argv);
/* init Visualization Library */
/* setup the OpenGL context format */
format.setDoubleBuffer(true);
format.setRGBABits( 8,8,8,0 );
format.setDepthBufferBits(24);
format.setMultisample(false);
format.setFullscreen(false);
//format.setOpenGLProfile( GLP_Core );
//format.setVersion( 3, 3 );
/* create the applet to be run */
ref<Applet> applet = new App_RotatingCube;
applet->initialize();
/* create a native Qt4 window */
/* bind the applet so it receives all the GUI events related to the OpenGLContext */
qt4_window->addEventListener(applet.get());
/* target the window so we can render on it */
applet->rendering()->as<Rendering>()->renderer()->setFramebuffer( qt4_window->framebuffer() );
/* black background */
applet->rendering()->as<Rendering>()->camera()->viewport()->setClearColor( black );
/* define the camera position and orientation */
vec3 eye = vec3(0,10,35); // camera position
vec3 center = vec3(0,0,0); // point the camera is looking at
vec3 up = vec3(0,1,0); // up direction
mat4 view_mat = mat4::getLookAt(eye, center, up);
applet->rendering()->as<Rendering>()->camera()->setViewMatrix( view_mat );
/* Initialize the OpenGL context and window properties */
int x = 10;
int y = 10;
int width = 512;
int height= 512;
qt4_window->initQt4Widget( "Visualization Library on Qt 4 - Rotating Cube", format, NULL, x, y, width, height );
/* show the window */
qt4_window->show();
/* run the Win32 message loop */
int val = app.exec();
/* deallocate the window with all the OpenGL resources before shutting down Visualization Library */
qt4_window = NULL;
/* shutdown Visualization Library */
return val;
}
// Have fun!

Using the wxWidgets Utility Bindings

Complete source: src/examples/WX_example.cpp

#include "Applets/App_RotatingCube.hpp"
using namespace vlWX;
using namespace vl;
//-----------------------------------------------------------------------------
// main window
//-----------------------------------------------------------------------------
class MyFrame: public wxFrame
{
public:
MyFrame(wxWindow *parent, const wxString& title, const wxPoint& pos, const wxSize& size, long style = wxDEFAULT_FRAME_STYLE):
wxFrame(parent, wxID_ANY, title, pos, size, style) {}
~MyFrame(){}
};
//-----------------------------------------------------------------------------
// implement the application
//-----------------------------------------------------------------------------
class MyApp: public wxApp
{
public:
bool OnInit();
int OnExit();
};
//-----------------------------------------------------------------------------
IMPLEMENT_APP(MyApp)
//-----------------------------------------------------------------------------
bool MyApp::OnInit()
{
/* open a console so we can see the applet's output on stdout */
/* init Visualization Library */
VisualizationLibrary::init();
MyFrame *frame = new MyFrame(NULL, L"WXGLCanvas", wxDefaultPosition, wxSize(400, 300));
// Initialize the OpenGL context and window properties
// See: https://docs.wxwidgets.org/3.1/glcanvas_8h.html#wxGL_FLAGS
int gl_context_format[] =
{
WX_GL_RGBA,
WX_GL_DOUBLEBUFFER,
WX_GL_STENCIL_SIZE, 8,
WX_GL_LEVEL, 0,
//wx_GL_COMPAT_PROFILE,
//WX_GL_SAMPLE_BUFFERS, 1,
//WX_GL_SAMPLES, 4,
//WX_GL_MIN_RED, 8,
//WX_GL_MIN_GREEN, 8,
//WX_GL_MIN_BLUE, 8,
//WX_GL_MIN_ALPHA, 8,
//WX_GL_DEPTH_SIZE, 24,
0
};
ref<WXGLCanvas> vl_gl_canvas = new WXGLCanvas(
frame, // parent
wxID_ANY, // id
gl_context_format, // attribList
wxDefaultPosition, // pos
wxDefaultSize, // size
wxFULL_REPAINT_ON_RESIZE, // style
"GLCanvas", // name
wxNullPalette // palette
);
/* create the applet to be run */
ref<Applet> applet = new App_RotatingCube;
applet->initialize();
/* target the window so we can render on it */
applet->rendering()->as<Rendering>()->renderer()->setFramebuffer( vl_gl_canvas->framebuffer() );
/* black background */
applet->rendering()->as<Rendering>()->camera()->viewport()->setClearColor( black );
/* define the camera position and orientation */
vec3 eye = vec3(0,10,35); // camera position
vec3 center = vec3(0,0,0); // point the camera is looking at
vec3 up = vec3(0,1,0); // up direction
mat4 view_mat = mat4::getLookAt(eye, center, up);
applet->rendering()->as<Rendering>()->camera()->setViewMatrix( view_mat );
/* show the window */
frame->Show();
/* THE ORDER IS IMPORTANT IMPORTANT */
vl_gl_canvas->initGLContext();
/* bind the applet so it receives all the GUI events related to the OpenGLContext */
vl_gl_canvas->addEventListener(applet.get());
/* these must be done after the window is visible */
int x = 0;
int y = 0;
int width = 512;
int height= 512;
frame->SetPosition( wxPoint(x,y) );
frame->SetClientSize( wxSize(width,height) );
frame->SetLabel(wxT("Visualization Library on wxWindows - Rotating Cube"));
return true;
}
//-----------------------------------------------------------------------------
int MyApp::OnExit()
{
VisualizationLibrary::shutdown();
return 0;
}
//-----------------------------------------------------------------------------
// Have fun!

Using the Win32 Utility Bindings

Complete source: src/examples/Win32_example.cpp

#include "Applets/App_RotatingCube.hpp"
using namespace vl;
using namespace vlWin32;
int APIENTRY WinMain(HINSTANCE /*hCurrentInst*/, HINSTANCE /*hPreviousInst*/, LPSTR /*lpszCmdLine*/, int /*nCmdShow*/)
{
/* open a console so we can see the applet's output on stdout */
/* init Visualization Library */
/* setup the OpenGL context format */
format.setDoubleBuffer(true);
format.setRGBABits( 8,8,8,0 );
format.setDepthBufferBits(24);
format.setFullscreen(false);
format.setMultisample(false);
/* create the applet to be run */
ref<Applet> applet = new App_RotatingCube;
applet->initialize();
/* create a native Win32 window */
/* bind the applet so it receives all the GUI events related to the OpenGLContext */
win32_window->addEventListener(applet.get());
/* target the window so we can render on it */
applet->rendering()->as<Rendering>()->renderer()->setFramebuffer( win32_window->framebuffer() );
/* black background */
applet->rendering()->as<Rendering>()->camera()->viewport()->setClearColor( black );
/* define the camera position and orientation */
vec3 eye = vec3(0,10,35); // camera position
vec3 center = vec3(0,0,0); // point the camera is looking at
vec3 up = vec3(0,1,0); // up direction
mat4 view_mat = mat4::getLookAt(eye, center, up);
applet->rendering()->as<Rendering>()->camera()->setViewMatrix( view_mat );
/* Initialize the OpenGL context and window properties */
int x = 0;
int y = 0;
int width = 512;
int height= 512;
win32_window->initWin32GLWindow(NULL, NULL, "Visualization Library on Win32 - Rotating Cube", format, x, y, width, height );
/* show the window */
win32_window->show();
/* run the Win32 message loop */
int res = vlWin32::messageLoop();
/* deallocate the window with all the OpenGL resources before shutting down Visualization Library */
win32_window = NULL;
/* shutdown Visualization Library */
return res;
}
// Have fun!

Using the MFC Utility Bindings

Complete source: src/examples/MFC_example/MFC_example.cpp

#include "StdAfx.h"
#include "Applets/App_RotatingCube.hpp"
using namespace vl;
using namespace vlMFC;
/* MFC_Example: implements the MFC application */
class MFC_Example: public CWinApp
{
public:
MFC_Example() {}
virtual BOOL InitInstance();
virtual int ExitInstance();
/*virtual int Run();*/
virtual BOOL OnIdle(LONG lCount);
protected:
ref<MFCWindow> mVLCWin;
DECLARE_MESSAGE_MAP ()
};
BEGIN_MESSAGE_MAP(MFC_Example, CWinApp)
END_MESSAGE_MAP()
/* instance of the MFC application */
MFC_Example mfc_app;
/* updates the GL window */
BOOL MFC_Example::OnIdle(LONG lCount)
{
if( mVLCWin->continuousUpdate() )
mVLCWin->Win32Context::update();
else
Sleep(1);
return TRUE;
}
/* called when the application exits */
int MFC_Example::ExitInstance()
{
CWinApp::ExitInstance();
/* destroy the window and the OpenGL rendering context */
mVLCWin = NULL;
/* shutdown Visualization Library */
return 0;
}
/* called when the application starts */
BOOL MFC_Example::InitInstance()
{
CWinApp::InitInstance();
/* open a console so we can see the program's output on stdout */
/* init Visualization Library */
/* setup the OpenGL context format */
format.setDoubleBuffer(true);
format.setRGBABits( 8,8,8,0 );
format.setDepthBufferBits(24);
format.setFullscreen(false);
format.setMultisample(true);
/* create the applet to be run */
ref<Applet> applet = new App_RotatingCube;
applet->initialize();
/* instance the MFC window/OpenGLContext */
mVLCWin = new MFCWindow;
/* bind the applet so it receives all the GUI events related to the OpenGLContext */
mVLCWin->addEventListener(applet.get());
/* target the window so we can render on it */
applet->rendering()->as<Rendering>()->renderer()->setFramebuffer( mVLCWin->framebuffer() );
/* black background */
applet->rendering()->as<Rendering>()->camera()->viewport()->setClearColor( black );
/* define the camera position and orientation */
vec3 eye = vec3(0,10,35); // camera position
vec3 center = vec3(0,0,0); // point the camera is looking at
vec3 up = vec3(0,1,0); // up direction
mat4 view_mat = mat4::getLookAt(eye, center, up);
applet->rendering()->as<Rendering>()->camera()->setViewMatrix( view_mat );
/* Initialize the OpenGL context and window properties */
int x = 100;
int y = 100;
int width = 512;
int height= 512;
mVLCWin->initMFCWindow(NULL, NULL, "Visualization Library on MFC - Rotating Cube", format, x, y, width, height);
/* MFC specific stuff */
m_pMainWnd = mVLCWin.get();
m_pMainWnd->ShowWindow(m_nCmdShow);
m_pMainWnd->UpdateWindow();
return TRUE;
}
// Have fun!

Using the SDL GUI Utility Bindings

Complete source: src/examples/SDL_example.cpp

#include "Applets/App_RotatingCube.hpp"
using namespace vl;
int main(int argc, char* args[])
{
/* init Visualization Library */
/* setup the OpenGL context format */
format.setDoubleBuffer(true);
format.setRGBABits( 8,8,8,0 );
format.setDepthBufferBits(24);
format.setFullscreen(false);
//format.setMultisampleSamples(16);
//format.setMultisample(true);
/* create the applet to be run */
ref<Applet> applet = new App_RotatingCube;
applet->initialize();
/* create a native SDL window */
/* bind the applet so it receives all the GUI events related to the OpenGLContext */
sdl_window->addEventListener(applet.get());
/* target the window so we can render on it */
applet->rendering()->as<Rendering>()->renderer()->setFramebuffer( sdl_window->framebuffer() );
/* black background */
applet->rendering()->as<Rendering>()->camera()->viewport()->setClearColor( black );
/* define the camera position and orientation */
vec3 eye = vec3(0,10,35); // camera position
vec3 center = vec3(0,0,0); // point the camera is looking at
vec3 up = vec3(0,1,0); // up direction
mat4 view_mat = mat4::getLookAt(eye, center, up);
applet->rendering()->as<Rendering>()->camera()->setViewMatrix( view_mat );
/* Initialize the OpenGL context and window properties */
int x = 0;
int y = 0;
int width = 512;
int height= 512;
sdl_window->initSDLWindow( "Visualization Library on SDL - Rotating Cube", format, x, y, width, height );
/* run SDL message loop */
/* deallocate the window with all the OpenGL resources before shutting down Visualization Library */
sdl_window = NULL;
/* shutdown Visualization Library */
return 0;
}
// Have fun!

Using the GLUT GUI Utility Bindings

Complete source: src/examples/GLUT_example.cpp

#include "Applets/App_RotatingCube.hpp"
using namespace vl;
int main ( int argc, char *argv[] )
{
/* init GLUT */
int pargc = argc;
glutInit( &pargc, argv );
/* init Visualization Library */
/* install Visualization Library shutdown function */
/* setup the OpenGL context format */
format.setDoubleBuffer(true);
format.setRGBABits( 8,8,8,0 );
format.setDepthBufferBits(24);
format.setMultisample(false);
format.setFullscreen(false);
//format.setOpenGLProfile( GLP_Core );
//format.setVersion( 3, 3 );
/* create the applet to be run */
ref<Applet> applet = new App_RotatingCube;
applet->initialize();
/* create a native GLUT window */
/* bind the applet so it receives all the GUI events related to the OpenGLContext */
glut_window->addEventListener(applet.get());
/* target the window so we can render on it */
applet->rendering()->as<Rendering>()->renderer()->setFramebuffer( glut_window->framebuffer() );
/* black background */
applet->rendering()->as<Rendering>()->camera()->viewport()->setClearColor( black );
/* define the camera position and orientation */
vec3 eye = vec3(0,10,35); // camera position
vec3 center = vec3(0,0,0); // point the camera is looking at
vec3 up = vec3(0,1,0); // up direction
mat4 view_mat = mat4::getLookAt(eye, center, up);
applet->rendering()->as<Rendering>()->camera()->setViewMatrix( view_mat );
/* Initialize the OpenGL context and window properties */
int x = 0;
int y = 0;
int width = 512;
int height= 512;
glut_window->initGLUTWindow( "Visualization Library on GLUT - Rotating Cube", format, x, y, width, height );
/* ... you can open more than one GLUT window! */
/* enter the GLUT main loop */
glutMainLoop();
/* this point is never reached since glutMainLoop() never returns! */
return 0;
}
// Have fun!